Arduino robot build
I’m a perennial tinkerer, and as such have always been fascinated by Arduino. When I first started using computers I wanted to trigger events in the real world, that wasn’t realized until I purchased an Arduino clone from Sparkfun.
 After blinking the led I struggled to find a real-world use for the thing. After a short-lived foray into making a washing-machine monitor, it sat for a long time gathering dust.
Finally my son asked me to build a robot. That’s real-world enough!
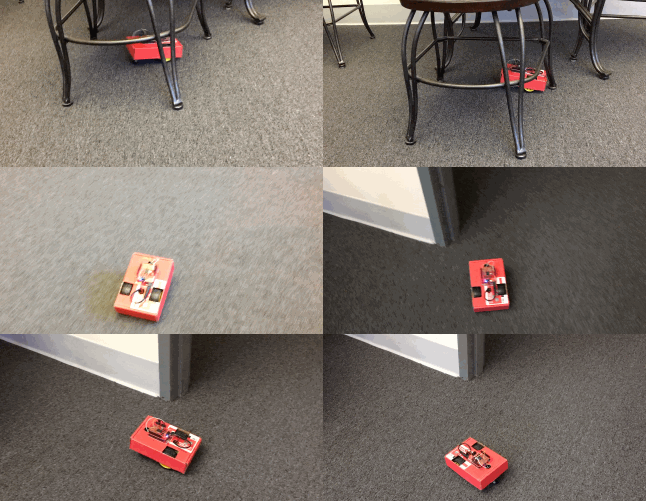
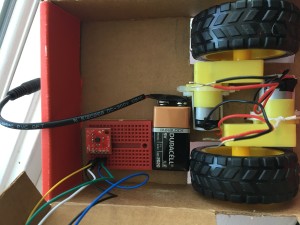
I ordered a set of wheels, motors and motor shield, again from Sparkfun,and set to work. Using the box the shield came in, I cut holes and used the box as the chassis. This created problems later on, but was a cheap way to build the robot.
I had previously purchased and accelerometer for the aborted washing-machine project, so that would be my blind robot’s way of finding it’s place in the world.
I wanted low-profile style wheels, so my cutaways were designed so the motors sat inside the box. This was a challenge since the weight of the entire robot would be pulling down, away from the motors. My first solution was to hot-glue the motors in place.
 I soldered the jumpers, then hot-glued the motors in a flip-flop pattern, only to realize I hadn’t tested the motors, oops. I tested each motor with a 9v battery only to discover neither ran. I know my soldering skills are sub-par, but that was terrible. I kicked myself for not testing before glueing.
Disheartened, I put the project aside for a couple months.
When I came back to it, I decided to throw caution into the wind and just ripped the motors out. After that I realized my battery was dead, and the soldering was fine. :face-palm:
Somewhere in phase 2 I ran out of hot glue, and didn’t want to spend anymore money. After floundering I found a roll of double-sided tape for those window plastic wraps. That stuff is the best and is sure to be used in my next project.
Having finally resolved the battery issue and fixing the motors in place, I was finally able to write some code. I cribbed Shield control code from Sparkfun. With this code I could pre-program some “dumb” movements on the robot, but I wanted him to explore the world.
Next coding challenge was to connect the accelerometer and get some inputs.
int scale = 3;
boolean micro_is_5V = false;

void setup() {
 Serial.begin(115200);
}

void loop() {
 // Get raw accelerometer data for X axis
 int rawX = analogRead(A0);

 float scaledX = mapf(rawX, 0, 1023, -scale, scale);

 Serial.print("X: "); Serial.print(scaledX); Serial.println(" g");
 Serial.println();

}

float mapf(float x, float in_min, float in_max, float out_min, float out_max)
{
 return (x - in_min) * (out_max - out_min) / (in_max - in_min) + out_min;
}
This gives me a simple scaled measure of the change in momentum along the x axis. It might behoove me to get the changes along the z and y axis as well.
With some experimentation I figured that getting a reading of
scaledX > 1.0
is approximate to when it bumps into something at full speed.
One issue is that the accelerometer trips that value when the it accelerates, doi. To try and solve this I created a function to slowly accelerate:
void accelerateForward() {
 driveArdumoto(MOTOR_A, CCW, 64);
 driveArdumoto(MOTOR_B, CCW, 64);
 delay(800);
 driveArdumoto(MOTOR_A, CCW, 128);
 driveArdumoto(MOTOR_B, CCW, 128);
 delay(800);
 driveArdumoto(MOTOR_A, CCW, 192);
 driveArdumoto(MOTOR_B, CCW, 192);
 delay(800);
 driveArdumoto(MOTOR_A, CCW, 255);
 driveArdumoto(MOTOR_B, CCW, 255);
}
Now I could pass some back-up and turn around behavior into an if block:
if (scaledX > 1.0) {
 stopArdumoto(MOTOR_A);
 stopArdumoto(MOTOR_B);
 delay(800);
 // Reverse
 driveArdumoto(MOTOR_A, CW, 255);
 driveArdumoto(MOTOR_B, CW, 255);
 delay(1200);
 // Turn to the right
 driveArdumoto(MOTOR_A, CCW, 255);
 driveArdumoto(MOTOR_B, CW, 255);
 delay(800);
 // Pause for effect
 stopArdumoto(MOTOR_A);
 stopArdumoto(MOTOR_B);
 delay(800);
 // Get back up to speed without triggering if block
 accelerateForward();
 }
My bump detection is largely ad-hoc, and particular to the floor, speed of the motors, etc that will affect the trigger value.
Moving forward, the next step is to use all three accelerometer axises and to graph them in real-time. That way I can get better data on what is a bump-stop versus a bump in the carpet.
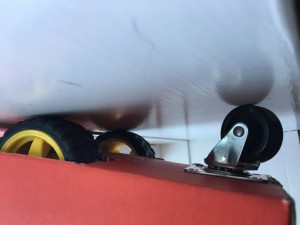
 I stuck an oversized caster to the robot to help it move more smoothly, this gives it a canted-up look I don’t love. Also, the caster get’s stuck every once in a while and sends the robot in circles.
Finally, I’d like to get another input to let the robot know when to turn. I’ve noticed that when it runs into something the motors strain, and I wonder if there’s a way to get data back from the motors to let us know when it’s jammed.